Friday, January 7, 2011

for sale


1973 gaggia orione, fully restored

reasonable offers will be entertained

the first shot


i didn't plumb in the machine. i just remove the safety valve on top of the boiler and fill it with bottled water. that will suffice until the machine finds a permanent place.
now it's grinding, filling, grooming, tamping and slamming the portafilter back on the grouphead. then the strong pull on the lever all the way down till the catch latches in. preinfusion for 5-7 seconds, then releasing the lever. watching it going up and observing the sweet stream of delicious coffee coming out of the portafilter for the next 25 seconds.
solid, mon!!!!

pressure


i needed a tamper and couldn't get any here in t
town. so whipped one out on the lathe. i also fired the machine up before the final installation of the bodywork to check on leaks. pressure rising to 1.2 bars, adjustment of the pressurestat followed later. one small dripping at the lower sightglass fitting. carefully tightened the nut, leak became history. otherwise all is nice and dandy!

costomizing and cleaning

the portafilter got a new handle out of walnut which i turned on my lathe where also the portafilter got some machining done. yeah, open it up, man!! you can have the nicest, the best, the most expensive machine in the world, but ... without a very good grinder it's pretty much worthless. actually the grinder is more of value to get a good espresso than the machine itself. super nice shannon of farm:table is so gracious and is lending me their backup grinder. to make up for that i took the mazzer super jolly apart, cleaned it, greased it and adjusted it. it's like new again...


almost there!


the grouphead is back! sergio kept his promise! 8 day turnaround time, wow! it's fairly heavy as you can see. now the reassembly is almost done. the bodywork received a precise fitting. it's really like installing hood and fenders on a car. consistent gap line and so on. it's loosening bolts here, tightening there, wiggling that part, pushing that panel... it takes some time. and don't scratch the fresh paint!

Thursday, January 6, 2011

taking shape

reassembling with ss fasteners. wiring with heat resistant wire with a new switch schematic. it's off; off; 750W; 1300W; 2050W.
it's wired for 120V, so the maximum load is 17 amps. one could easily modify it to 240V by wiring the heating elements in line instead of parallel. of course there'd be only off/2050W.
pressurestat got a new ss bracket, before it just hang on the copper tubing (?) .
from espresso parts i got new knobs. unfortunately the quality is just not the same as on the old ones.
for the refill valve i reworked a regular valve knob so the bottom panel is symmetrical (not on this photo yet). originaly it had only a plastic disc. the left valve is refill, the right one the hot water spout.


fast progress...


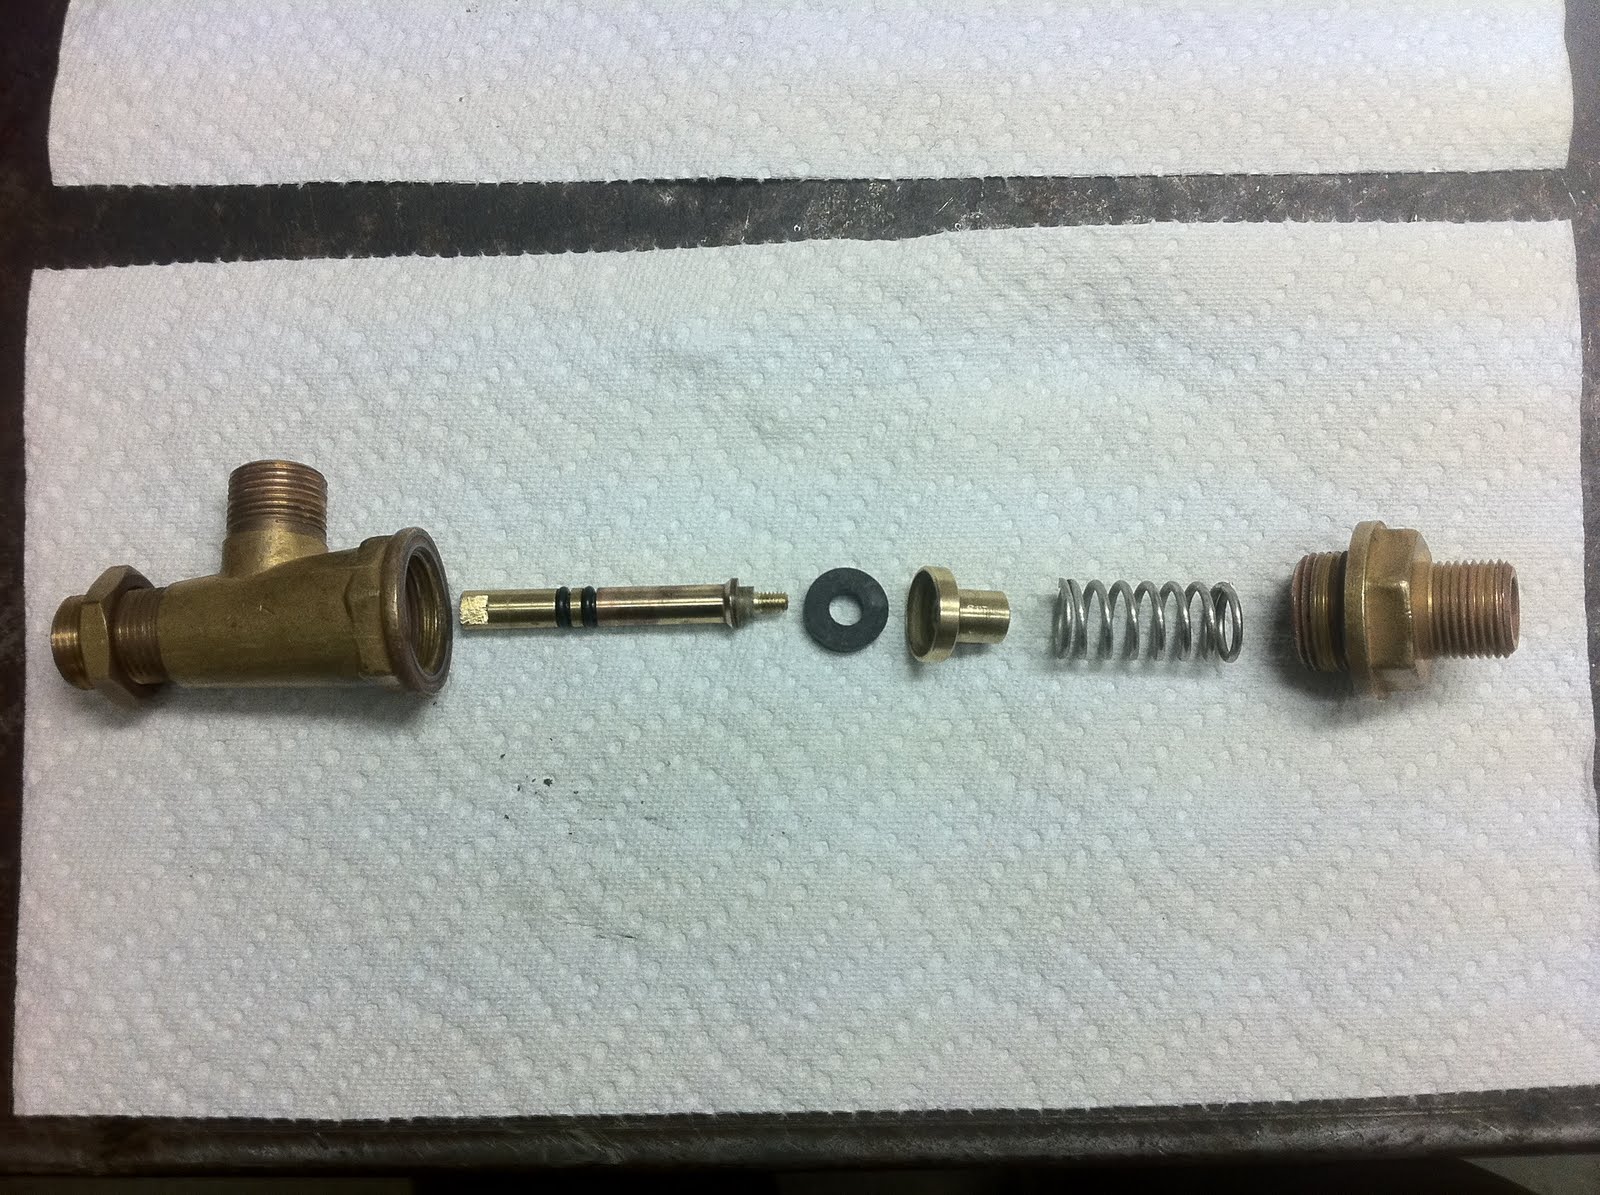
the boiler is complete, the valves too. all the plumbing descaled, cleaned, polished and clearcoated.
now the grouphead... well, no progress on that front. the espresso machine repair shop here in sf is superbusy, works solely on conventional pump machines (who has a lever here in town anyway besides Blue Bottle?) and doesn't have any clue regarding lever machines. no problem if they would let you know right away...
anyway, doing some more research i found a company down in so-cal which was the distributor and customizer of gaggias in the 70's and 80's. they marketed as ABC back then. the company is still in business. and so is their repair shop. i talked with sergio whose response was 'no problem. send in the grouphead and you'll have it back in a week'. what??? seriously?

putting it together


it's shortly after thanksgiving. a quick turnaround is always welcome. and, as promised the powdercoating was done within 8 days and the quality very satisfactory! i really can recommend west coast powdercoating in south san francisco.
i discovered the year of make, at least according to the pressure gauge it's 1973. the heydays of orange/brown color schemes!
the gaggia originally had 2 heaters but some previous owner removed the lower wattage heating element and brazed it shut. i got a replacement from espresso parts which fit right in. i had to braze the gasket seat on the right heating element opening on the boiler plate because it was starkly pitted. on the left the taps for the studs where misaligned and the threading partly destroyed. i brazed, drilled and tapped and fitted on both openings new custom made ss studs.
in general i replaced all fasteners with stainless steel parts.

Wednesday, January 5, 2011

outsourcing


it's end of october in the meantime. i tried to sandblast the frame at my friend wendell's shop, but the coat of paint turned out to be quite stubborn. btw, if you need the service of a fabricator of the very first order, i can put you in touch with wendell. if it's metal he can do everything with it. if he can't, it's not metal.
i went on a search for a powder coating place and after a surprisingly short mission i found an excellent shop in south san francisco, west coast powder coating, their number is 650-871-0400. they did a great and quick job with both the frame and the bodywork. within 8 days everything was finished for a very reasonable price. i decided to keep the old paint scheme, brown for the frame and orange for the bodywork.

Tuesday, January 4, 2011

the strip down


not many surprises while stripping down the machine. the only real surprise was how simple lever machines actually are.
the boiler was moderately scaled. all the fasteners were quite easily removed.

on the work bench


taking the machine apart came rather easy. the only thing i had not been really sure about was the group head. i removed the top part with the rack and pinion mechanism and the piston. further i removed the set of seals from the cylinder. i contacted espresso parts in WA, but couldn't really get an answer which seals i need and how many. it's not really clear in the parts diagram.
so i decided to drop the group head off at an espresso machine repair shop here in san francisco. they quoted $150 and a couple of weeks. great!! or so i thought...

Monday, January 3, 2011

getting started


the gaggia found a temporay resting place on my work bench. or let's call it the operation room.
after removing the body work it became more invasive.
during the disassembly process i took lots of pictures to help me later with putting everything back together.
a lever machine is actually pretty simple. it consists of relatively few parts:
-frame and bodywork;
-boiler w/ boiler plate w/ heating elements;
-group head;
-3 valves (refill, steam, hot water);
-pressure gauge;
-pressurestat;
-safety valve;
-sight glass;
-plumbing;
-electric switch;
that's it!

4 years later


in the last 2 to 3 years i got more and more into coffee and became a conossieur and a bit of a geek. esp. when hanging out with my friend ben, who is about to open a high end coffee place in queens, NY and doing the build out right now. you can follow him on twitter.com/kickshawnyc.
talking with ben about his project and getting infected by his enthusiasm was the trigger to pull the gaggia out of storage and to get busy with it.
and that happened on october 3rd, 2010...

Sunday, January 2, 2011

collecting dust...


not much happened after i found the machine. i dragged it in my shop, dusted it off and tried to identify it. a metal tag said: gaggia orione 3ug.
i took a few pictures and sat down at the laptop to do some research. but not much turned up besides 2 entries on the home barista site.
well, that was maybe 4 years ago. the gaggia became one of several projects reserved for time slots in the future....

dumpster diving w/o the diving part...


yeah, it was one of those days... i had to run errands around potrero hill. as i was getting into my van, something caught my attention. in the driveway next to this old wherehouse sat a dumpster, one those 7 ft tall debris boxes with 2 steel swing doors. the rear half of the box had been filled with what i remember was construction debris. and right before all that twisted metal, splintered wood and empty paint buckets sat an bright orange cubic contraption on the steel floor. i recognized it immediately as an commercial espresso machine. not any machine but, indicated by the bright paint scheme, one from the early 70's! and on top of that a lever operated one!
i backed up my van and managed somehow to lift that klotz into my van. jeez, was that heavy! i guess something around 65 kg.